- europages
- >
- COMPANIES - SUPPLIERS - SERVICE PROVIDERS
- >
- laser measurements
Results for
Laser measurements - Import export
KNIGHT OPTICAL (UK) LTD
United Kingdom
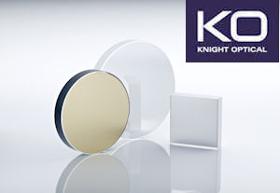
Knight Optical can offer you Plane Mirrors (general, λ/1 and λ/4), for use within Laser Distance Measurement Applications in a range of materials such as Soda-lime float glass, white float glass, and BK7 glass. Plane mirrors also known as front surface mirrors or first surface mirrors are used widely within Laser Distance Measurement applications. As stock we hold a number of general purpose, λ/1 and λ/4 with a range of up to 6 types of coatings such as Enhanced Aluminium, Ali/SiO2 and Ali/Mgf2. Our general purpose grade mirrors are made from good quality float glass and generally available in thicknesses of 1mm, 3mm and 6mm as standard. Laser Distance Measurement devices utilise the use of a laser beam to be able to determine the distance of an object. How optical mirrors are used in conjunction with these devices is that, a mirrored surface can be measured with a laser tracker; which will help determine the distance between the laser distance Read PDF for full information..
Request for a quote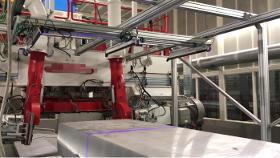
QUELLTECH GMBH
Germany
Particular Challenges of the Application: By tactile equipment, determination of the deepest point on a rough metal surface is neither simple or precise. As a consequence, often either too much material is removed, or the surface is still covered with defects which have to be eliminated by a following milling cycle. The equipment is arranged in parallel, so that the complete width of the slabs is covered. The sensors are calibrated to a common coordinate system and mounted on a movable gantry. Before measurement, the slabs are fixed in place. The scanners mounted on the gantry are guided over the measuring object, driven by an electric motor. The point cloud recorded by the four scanners is consolidated in a PC by means of the QuellTech image processing software which calculates the difference between highest and lowest point of the corresponding surface and compensates for possible inclination of the slab (detrending).
Request for a quote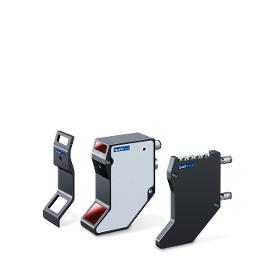
QUELLTECH GMBH
Germany
The QuellTech laser sensor family Q4 or Q5 used for these tasks is generally mounted on an arm of a rotational axis, to scan along the complete 360° angle of the internal surface in a sequence of strips. The Q4 sensors can also be used to control the weld seam tracking itself for rapid setup and ease of use. Even during a project, the range and scope of the Q Series sensor demonstrates the advantages of a modular system to quickly adapt to project needs, where the smallest system has provided fast analysis of pipes as small as 105mm. The low power, with standard communication protocols, enable battery powered systems to transmit wireless data to other systems for review and cloud back up.
Request for a quote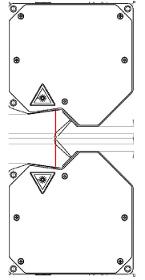
QUELLTECH GMBH
Germany
Many materials cannot be measured tactilely, therefore non-contact thickness measurements become necessary. Especially e.g. with glowing materials, or wet processes, a continuous tactile measurement is nearly impossible. Furthermore, web speeds in plant engineering and production have increased, requiring a corresponding fast sampling rate of the measuring systems. In addition, high measuring widths are often required. Why is contact free measurement technology so perfect for this application? Can be used in any web width, Scalable measurement thicknesses from a few millimetres to several meters, Thickness and coating thickness can be measured for different materials, Vibrations of the web materials, can be compensated, Turnkey solution for mechanical engineering, Non-contact and non-destructive measurement method, Large distances to the measured object are possible, Measurement of free forms,
Request for a quote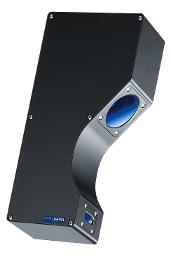
QUELLTECH GMBH
Germany
Q6-Lasor sensor – High Speed, High Resolution – Q6 Sets New Standards for 2D / 3D Measurement: Resolution of up to 0.6 µm Profile speed of up to 25.000 profiles/s Measuring ranges between 2 mm and up to 370 mm available Laser wave lengths starting from UV via blue, red and green through to IR The Q6 laser sensor series has already proven its ability in numerous industrial applications demanding a high degree of precision and process stability at increased travel speed. For common environments, connection is established via GIGE interface and GeniCam. Integration with linear axes and robots is possible by means of encoder inputs and trigger option.
Request for a quote
QUELLTECH GMBH
Germany
Rotationally symmetrical driving gears in a line producing for automotive industry are mutually connected by electron beam welding. The camera inspection carried out until was not able to assess the quality of the weld seams at the required precision. Non-contact laser measurement system Particular Challenge: As the welding seams show a high reflectivity and are located at a position hard to access, inspection is difficult, all the more so as they dispose of a width of only 500µm. Therefore it is quite a challenge for the laser measurement system. The QuellTech solution: A QuellTech Laser Scanner Q4-5 with extremely small shape factor and high resolution proved to be perfectly suited for this application. In order to suppress reflections from elements in the surroundings, a particular algorithm has been integrated. Furthermore, this laser measurement system features a particularly adapted laser wavelength and an ultrafine laser line.
Request for a quote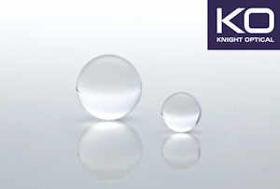
KNIGHT OPTICAL (UK) LTD
United Kingdom
Ball Lenses are widely used for focusing & coupling light into & out of fibres. With the high refractive index of Sapphire (Al2O3) material, it yields a low spherical aberration that can be used in the range of UV from 200nm up to 5µm, and with it being one of the hardest materials they are resistant to damage. The key feature of ball lenses is their short back focal length allowing for precision coupling where size or space is a limiting factor in the system. Typically used in pairs, where one lens acts as collimator for the second to focus the light back into the coupled fibre. Ball Lenses are manufactured from a single substrate of glad and therefore, depending on the geometry of the input source, can focus or collimate light. Half Ball Lenses can also be used as an interchange with a full ball lens for more compact designs. Read the PDF for more information...
Request for a quote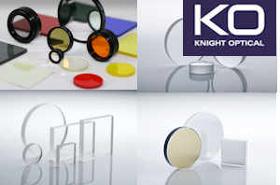
KNIGHT OPTICAL (UK) LTD
United Kingdom
Knight Optical can offer transmit and receive windows and mirrors for LIDAR systems using visible, NIR (0.9 to 1.5µm) and Mid-Waveband Infra-Red (MWIR, 3 to 5µm) light. Since the 1960s, scientists have used LIDAR (light detection and ranging) to study the atmosphere. Short pulses of laser light are used to detect particles or gases in the atmosphere, like a radar bounces radio waves off rain drops in clouds. A telescope collects and measures reflected laser radiation, like a radar dish collects the radar signal, leading to a profile of the atmosphere's structure along the path of the laser beam. Researchers can then determine the location, distribution, and nature of atmospheric particles and molecular species using an advanced LIDAR method called the Differential Absorption Lidar (DIAL) technique. Read PDF for more information
Request for a quote
RALF LANG MASCHINENBAU GMBH
Germany
Handling the friction and steel discs into the measuring system from storage 360° laser measurement of the thickness of friction and steel discs Stacking discs with the respective high points offset to each other Measuring the disc pack for stacking height (pack class) and plane parallelism
Request for a quote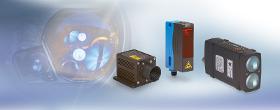
MICRO-EPSILON
Germany
Laser distance sensors are designed for non-contact distance measurements: laser gauges for measuring ranges up to 10m, laser distance sensors for up to 270m. These sensors are used for positioning and type classification in machine building and handling equipment.
Request for a quote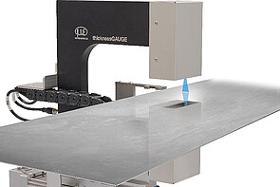
MICRO-EPSILON
Germany
thicknessGAUGE C.LP sensor systems use laser profile scanners for the thickness measurement. These scanners project a laser line onto the surface to be measured. The laser line compensates for strip tilting and enables profile averaging. The laser line measuring technique makes it possible to measure the thickness of structured materials such as embossed surfaces and perforated plates.
Request for a quote
MICRO-EPSILON
Germany
thicknessGAUGE C.LL sensor systems use laser triangulation sensors for the thickness measurement. These laser sensors enable high measuring rates at high speeds. The thicknessGAUGE.laser series impresses with a favorable price/performance ratio and is preferably used for thickness measurements of common surfaces such as plastics, wood and metals.
Request for a quote
MICRO-EPSILON
Germany
The optoNCDT 1220 is the entry-level model for precise measurements in industrial automation. This compact laser triangulation sensor measures displacement, distance and position with high precision. Based on an excellent price/performance ratio, this sensor is ideally suited to measurement tasks involving a large number of pieces. Therefore, the sensor can be used in all fields of automation technology, e.g., in machine building, 3D printers or robotics.
Request for a quote
MICRO-EPSILON
Germany
The optoCONTROL 1200 is based on the principle of light quantity measurement. The compact laser micrometer has all the evaluation electronics integrated in the case and the mounting is very flexible. High dynamic applications can be measured due to the measuring rate of 100 kHz.
Request for a quote
MICRO-EPSILON
Germany
scanCONTROL 30x2 laser scanners are powerful profile sensors in terms of size, accuracy and measuring rate. These laser scanners provide calibrated 2D profile data with up to approx. 8 million points per second. With a maximum profile frequency of 10 kHz, the scanners are designed for precise profile measurements in dynamic processes. The sensor matrix offers a resolution of 1,024 points with a point distance from 24 µm. This means that even small details can be detected reliably.
Request for a quote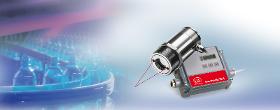
MICRO-EPSILON
Germany
thermoMETER CTLaser pyrometers are used for both industrial measurements and R&D. Two laser beams mark the measurement spot which ensures precise temperature measurements. The smallest measurement spot is 0.5 mm. The thermoMETER CTLaser infrared pyrometers can be used with various measuring objects. From extremely low temperatures (-50°C) to the highest temperatures (975°C), these IR pyrometers measure precisely and reliably.
Request for a quote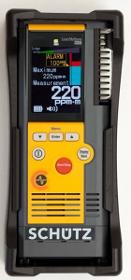
SCHÜTZ GMBH MESSTECHNIK
Germany
The Laser Mini offers a selective measurement of methane without interfering cross-sensitivities. The device monitors itself and is therefore almost maintenance-free. Thanks to the menu navigation in conjunction with supporting displays of the measurement history, absolute value, etc., the Laser Mini is easy and safe to use even by inexperienced users. The Laser Mini only needs to be switched on.
Request for a quoteDo you sell or make similar products?
Sign up to europages and have your products listed
NORELEM FRANCE
France
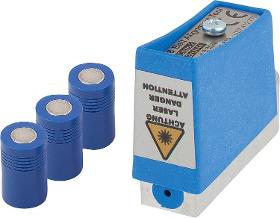
The line laser is a measuring device for aligning drive pulleys laterally, horizontally and vertically using a laser beam, preventing heavy wear to the edges of the belt. Laser beam range approx. 5 to 10 m Laser class 2 (EN 6082511997) Wavelength 630–680 mm Power < 1 mW Power supply 2 x 1.5 V (LR44) Note Never look directly into the laser beam and do not point it at other people, animals or strongly reflective surfaces. The device and the target points contain highpowered magnets. Individuals with pacemakers should not use the device due to safety reasons. Keep a safe distance away from electronic devices and wristwatches in order to prevent interference. The device must not be used in potentially explosive areas.
Request for a quote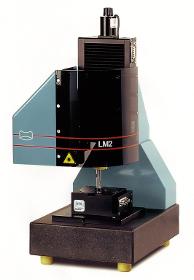
WALTER UHL TECHNISCHE MIKROSKOPIE GMBH & CO. KG
Germany
for the measurement of control cams on plasic rings in automatic gearboxes.
Request for a quote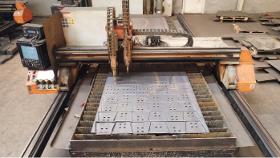
ILK IHRACAT AS.
Turkey
Shape Your Parts with Our Cut To Size Services In the manufacturing sector, accurately cutting parts to the right measurements and shapes is of vital importance for product quality. Through our professional precision cutting services, we execute your cuts with the utmost precision. Benefits of Cut to Measure Precision cutting is a technique that allows for accurate cutting of various materials like metal, wood, plastic, and more. With our expert team and state-of-the-art equipment, we cut your parts perfectly. Our Services: Laser Cutting: We accomplish even the most intricate designs with high precision using laser cutting technology. We provide laser cutting service between 0,5-70 mm thickness. Plasma Cutting: By cutting thick materials with a plasma, we achieve the best results.
Request for a quote
ZOLLER & FRÖHLICH GMBH
Germany
The Z+F PROFILER® 9012 M has a vertical 360° field-of-view and is the fastest profile imaging 2D laser measurement system in its class. With its scan rate of more than 1 million points per second and a maximum scanning speed of 200 profiles/sec. short distances between the profiles can be achieved even at high speeds of the carrier vehicle. Because of the high point density, even small objects are registered and processed by the software. Because the laser measurement system corresponds to laser class 1, the scanner can be used in urban environments without any restriction.A hardware-assisted pixel-by-pixel synchronization makes it possible to process signals form external devices. As a result, the position and orientation of the scan data can be determined.
Request for a quote
ZOLLER & FRÖHLICH GMBH
Germany
The Z+F PROFILER® 9012 A has a vertical 360° field-of-view and is the fastest profile imaging 2D laser measurement system in its class. With its scan rate of more than 1 million points per second and a maximum scanning speed of 200 profiles/sec. short distances between the profiles can be achieved even at high speeds of the carrier vehicle. Because of the high point density, even small objects are registered and processed by the software. Because the laser measurement system corresponds to laser class 1, the scanner can be used in urban environments without any restriction. A hardware-assisted pixel-by-pixel synchronization makes it possible to process signals form external devices. As a result, the position and orientation of the scan data can be determined.
Request for a quote
ZOLLER & FRÖHLICH GMBH
Germany
The Z+F PROFILER® 9012 has a vertical 360° field-of-view and is the fastest profile imaging 2D laser measurement system in its class. With its scan rate of more than 1 million points per second and a maximum scanning speed of 200 profiles/sec. short distances between the profiles can be achieved even at high speeds of the carrier vehicle. Because of the high point density, even small objects are registered and processed by the software. Because the laser measurement system corresponds to laser class 1, the scanner can be used in urban environments without any restriction. A hardware-assisted pixel-by-pixel synchronization makes it possible to process signals form external devices. As a result, the position and orientation of the scan data can be determined.
Request for a quote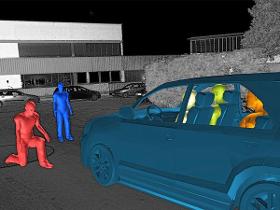
ZOLLER & FRÖHLICH GMBH
Germany
Within a few minutes, Z+F 3D laser scanners can provide accurate measurement data of crime scenes and accidents – indoors and outdoors. This data speeds up the investigation process by "freezing" the scanned crime scene and documenting it. These evaluations are accepted in court. Accident investigation The phase based 3D laser scanners of Z+F enable an accurate three-dimensional capturing of complete accident scenes with all the details like deformations of the vehicles or skidmarks. Using this technology, the question of the possible causes and sequence of the accidents can be analysed and answered more easily. Crime scene investigation The complete securing of evidence at crime scenes and the geometry measurement on the spot are of great importance. A crime scene is normally captured from various positions by the Z+F IMAGER®. By combining these scans, the viewer gets an overview of the complete scene.
Request for a quote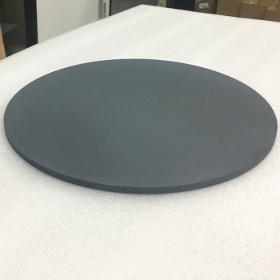
XIAMEN INNOVACERA ADVANCED MATERIALS CO., LTD
China
Porous ceramic plate is composed by the distributed evenly open pores which is interconnected by shape like arch , when the fluid through these pores,the suspended matter, colloidal particles, organic molecules are trapped, adsorbed inside the micropores,then track to achieve the purification and filtration homogenizing effect. The porous ceramic has the advatage with high strength, wear resistance, high temperature, corrosion, pollution, porosity distribution, long service life and easy to regenerate, which is particularly suitable for a variety of gas, liquid filtration and fluidized process. Applications of Alumina Porous Ceramic * Furnace work tubes * Kiln furniture, components & accessories * Thermocouple protection tubes * Heater Support Elements * High Temperature Electrical Insulators * Extreme temperature measurement components * Ceramic Laser components * High voltage electrical insulators
Request for a quote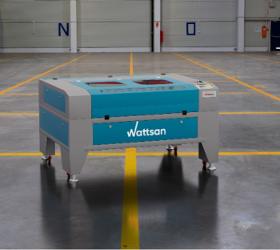
VIRMER
Netherlands
The Co2 laser cutting machine Wattsan 6040 is designed for serial laser cutting and engraving, it can easily handle wood, plywood, cardboard, paper, plexiglass, acrylic, plastic (except PVC), rubber, leather, fabrics and fur. Engraving is possible on glass, ceramics, and some stones, as well as on aluminum and other soft metals using thermal paste. Engraving on the machine is possible on materials up to a thickness of 25 cm (9.8 in). Through table: allows the laser cnc machine to work with material of unlimited length. The design of the equipment allows you to remove the front wall and use the freed space for through cutting. The working field of the laser cutting machine measuring 600x400 mm with a manual lifting table, is necessary for processing volumetric objects up to 25cm (9.8 in) thick. Work area = 600 x 400 mm Tube power = 80-90W Max engraving speed /s = 500 mm Dimensions = 765 mm x 1165 mm x 600 mm Net Weight = 121 kg
Request for a quote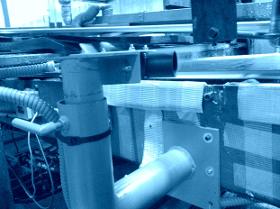
POFI-ENGINEERING
Luxembourg
Concept of the Laser: The conduct of a sandwich panels production line is usually managed by operators, and there is often that there are differences in production function of the operator to control (density, quality, productivity, …). The operator with many different tasks to perform, it also happens that the wave moves without noticing and it results in poor quality panels. The laser serves to measure the distance between the removal of foam and wave, once the distance set by the operator the laser takes over and manages the line speed to maintain a constant position of the wave. If there is a too great a speed correction to achieve the laser warns the operator. The set distance is displayed on a screen and can be stored. It will allow to verify the differences in positioning of the wave function and operators to address potential problems. During production, the operator is released from a spot and will be able to focus on other priorities. This system is compatible with all...
Request for a quote
MAINTENANCE PARTNERS
Belgium
Our field service teams carry out a wide variety of tests and measurements : Vibration analysis Laser alignment Dynamic balancing Oil analysis Electrical analysis Transformer analysis Thermography / Infrared Non-destructive tests (NDT – according to API RP 585, API RP 7G, ASNT SNT-TC-1A & ESC practices) Vibration Analysis Vibrations in a machine are generated by certain elements moving relatively to each other. These vibrations contain a lot of information about the condition of the machine and indicate whether there are problems or not. By performing a vibration analysis we can not only measure the severity of a particular problem, but in many cases, the exact location and cause of the problem. Vibration analysis can detect the following malfunctions: Imbalance Alignment error Eccentricity Bearing condition Condition of Gear Sets Belt and Pulley condition Mechanical looseness Electromagnetically induced forces
Request for a quote
AUTOMATION & ROBOTICS (A&R)
Belgium
The Control Unit for Prescription Lenses is a machine dedicated to prescription labs producing at least 1000 jobs per day. This multi-functional automatic machine is the only one on the market to combine the lens inspection according to the ISO/ANSI standards of all lens types, the mapping of freeform lenses, the flexible digital inking and the laser engraving. The measurement data exported by the machine are very useful for an effective process control. The Control Unit for Rx lenses is the perfect tool to increase your customer satisfaction, by improving your quality and optimizing the delivery times.
Request for a quoteResults for
Laser measurements - Import exportNumber of results
66 ProductsCountries
Category
- Sensors (9)
- Nozzles - ferrous metal (7)
- Laser - cutting and welding machines (5)
- Wires and cables - ferrous metal (5)
- 3D scanner (4)
- Measurement - Equipment & Instruments (4)
- Laser apparatus and instruments (2)
- Machine vision system (2)
- Monitoring and control equipment (2)
- Optical measuring equipment (2)
- Adjustment - machine tools (1)
- Automation - systems and equipment (1)
- Ceramics, industrial (1)
- Cutting - steels and metals (1)
- Mechanical engineering - custom work (1)
- Medical and surgical optics - instruments (1)
- Navigation - charterers (1)
- Offshore services (1)
- Optical instruments (1)
- Pipes and tubes, stainless steel (1)