- europages
- >
- COMPANIES - SUPPLIERS - SERVICE PROVIDERS
- >
- strain gages
Results for
Strain gages - Import export

BURSTER PRÄZISIONSMESSTECHNIK GMBH & CO KG
Germany
The 7270 TRANS CAL can run on standard or rechargeable batteries for portable use or from an external power supply. The handy model 7270 digital indicator supports load cells, pressure sensors and torque sensors based on strain gages. The 14 mm high display shows the current measured value. The TARE function allows any base load that may be present to be zeroed. The clear, well organized control structure enables quick and easy configuration of the TRANS CAL. The 7270 is equipped with a charge state indicator. Features: — Easy to operate - For all load cells, pressure sensors and torque sensors based on strain gages — Tare function - Excellent value for money - Built-in charge controller
Request for a quote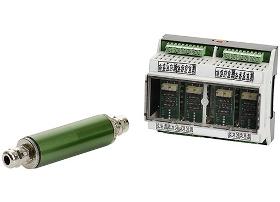
BURSTER PRÄZISIONSMESSTECHNIK GMBH & CO KG
Germany
Situations often occur in practice in which it is necessary to place a measuring amplifier immediately in the neighborhood of the sensor in order to be able to access a standard signal there. In this way, long distances to the evaluating electronics can be covered. This task can ideally be performed by the 9236 in-line measuring amplifier. With its high degree of protection (IP67) its singlechannel version can be integrated into the application even in the tough environment outside the switch gear cabinet. — Automatic production machinery — Laboratory measurements — Integration into customer‘s circuit boards — Field measurements Features: — Operates with up to 4 measuring channels — Voltage output 0 to ± 5 V / 0 to ±10 V — Protected against reverse connection and short-circuit — Also available as circuit board without housing — Simple configuration using DIP switch — High degree of protection up to IP67
Request for a quote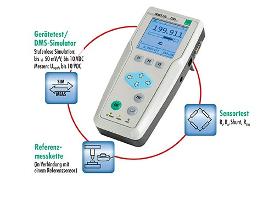
BURSTER PRÄZISIONSMESSTECHNIK GMBH & CO KG
Germany
The multipurpose digital indicator TRANS CAL 7281 can be used wherever there is a need to perform high-precision, in-situ calibrations of sensing components used in equipment such as presses, torque tools or pressure-regulating systems. An optional factory calibration certificate or German-accredited DKD/DAkkS calibration certificate can be provided when the measurement device needs to be used as a reference. This provides a quick and cost-effective way of assessing a system with traceable documentation of measurement results. If a reference measurement cannot be made because the sensor location is difficult to access, it is still possible to test the zero point, the input, output and isolation resistance as well as the calibrating offset of the fitted sensor. It is also possible to check the indicating device by measuring the excitation voltage and simulating the characteristic values (mV/V or V) of the sensor used.
Request for a quote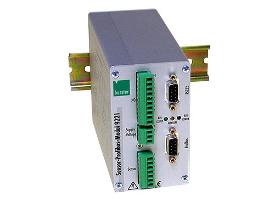
BURSTER PRÄZISIONSMESSTECHNIK GMBH & CO KG
Germany
The newly developed sensor PROFIBUS module model 9221 is predestined for the integration of various analog sensor output signals into complex, net worked and peripheral automation structures. This module finds its fields of application in the industrial automation technology as well as the test rig technology based on its secure and reliable transfer mode, the fast transfer speed and its simple construction. The inputs (e.g. PLC signal gauge) and outputs in addition to the external control allow a zero compensation by trigger via proximity switch or fast alerting on passing of set point values. Industrial type connection and mounting techniques enable the user the adaption and integration in the existing mechanical and electrical environment. The excellent quality of measurement together with the high grade capture of mean values also enable the application in research and development. The use of standardized PROFIBUS protocols makes the connection an easy task for the programmer.
Request for a quote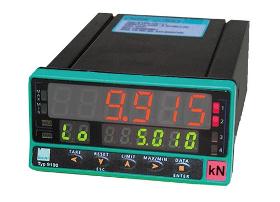
BURSTER PRÄZISIONSMESSTECHNIK GMBH & CO KG
Germany
Model 9180 supports force, pressure and torque sensors operating on the strain gauge principle, as well as the connection of position and angle sensors in potentiometer or DC/DC configuration. It also allows the measurement of process signals ± 1 V/ 5 V/ 10 V or 0 ...1 mA, 0(4) ... 20 mA. The current measured value is indicated on the 14 mm high LED main display, while a second display located directly below provides a reading of the peak value. The display is particularly suitable for highly accurate measurements due to the high accuracy of 0.1%. It is also possible to monitor up to 4 limit values and provide the results via relay or transistor outputs. Thus the process value display can be used for classification, process and control tasks. The current measured value is frozen on the display by activating an external HOLD signal. The TARE function is useful for balancing out previous loads for example.
Request for a quote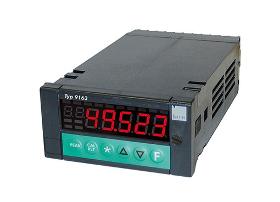
BURSTER PRÄZISIONSMESSTECHNIK GMBH & CO KG
Germany
The 9163 process value indicator covers a wide range of applications in which process values need to be measured, displayed, analyzed and transferred to higher-level control systems. Typical applications include measuring geometric values in production, for instance differential measurements, or testing material properties in the laboratory. The measured values can be transferred via PROFIBUS, RS232 interface or analog output. The multi-channel version can be used with up to four sensors. These sensors can be combined using mathematical functions, so that even complex measurement tasks can be performed with just the one instrument. Visual alarms on the display make it easier and more convenient to assess when values lie off-limits. Up to four configurable outputs are available as relay or logic outputs. The excellent measurement accuracy of 0.1% also makes this instrument suitable for high-precision applications.
Request for a quote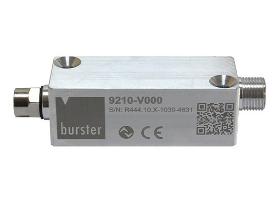
BURSTER PRÄZISIONSMESSTECHNIK GMBH & CO KG
Germany
The new strain gage amplifier with IO-Link interface enables digitalization of the measurement technology right from the sensor. Its compact design and high degree of protection allow the instrumentation amplifier to be used practically anywhere in the field. Strain gage sensors typically have an output voltage of a few millivolts. In industrial environments, e.g. in the vicinity of electric motors or frequency converters, interference can affect the measurement result when transmitting analog signals. This is reliably avoided using the new strain gage amplifier with IO-Link interface. The analog link between the sensor and instrumentation amplifier is kept as short as possible, the standardized IO-Link communication is fully digital and interference-free. The amplifier is powered directly via the IO-Link interface – a standardized 5-wire cable with M12 socket. Strain gage sensors can be connected via a 4-pin M8 connector.
Request for a quote
BURSTER PRÄZISIONSMESSTECHNIK GMBH & CO KG
Germany
The sensor element consists of a double bending beam with applied strain gages. Changes in the ohmic resistance of the strain gage fullbridge caused by applied forces are converted into electrical voltages. The precise value (characteristic value) of the output voltage, resulting from the application of a rated force to the sensor, is specified in the accompanying calibration protocol. The sensor has to be mounted by two screws on the cable side. The opposite side is meant to receive applied forces (loads). Once the rated stress or strain is exceeded by 20 %, further deflection of the bending beam is prevented by an integrated, mechanical stop. This protects the sensor element against permanent deformation.
Request for a quote
BURSTER PRÄZISIONSMESSTECHNIK GMBH & CO KG
Germany
The tension and compression load cell model 8435 enables universal and fast installation, requires hardly any installation space and upgrades with technical data that are readily achieved by larger sensors. Due to its excellent price-performance ratio with regard to its mechanical and electrical data, the force sensor finds its place in products that are also manufactured in larger quantities and calculated with a small budget. This model of load cell uses proven strain gage technology to perform measurements. Strain gages are applied to the sensitive element and connected to form a full bridge. FEATURES Measuring ranges from 0 ... 200 N up to 0 ... 5000 N Small dimensions Inexpensive execution Stable anti-kink protection Made of high quality stainless steel Connecting cable suitable for drag chains burster TEDS optionally available
Request for a quote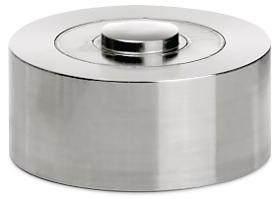
BURSTER PRÄZISIONSMESSTECHNIK GMBH & CO KG
Germany
Thanks to its compact shape and three fixing holes on its underside, the 8526 compression load cell can be used in a variety of applications. With its wide choice of measuring ranges from 0 ... 100 N up to 0 ... 1 MN, it really can cover a wealth of measurement tasks, from the laboratory to use in heavy industry. The integral load button provides an easy and reliable means of applying the force to be measured. Angle errors in the load application with a deviation from the measurement axis of up to 3° have only a minor influence on the measurement signal. For ideal measurement accuracy, the load cell should be mounted on a surface that has been ground and has a hardness of at least 60 HRC. The model 8526 load cell is designed with an internal elastic membrane, to which strain gages are attached. When a compressive load is applied to the load cell, the membrane is elastically deformed and transfers its tension to the strain gages.
Request for a quote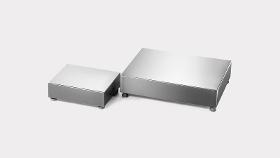
BIZERBA SE & CO. KG
Germany
Designed to be used for reference weight establishment Inside the load receptor there is an aluminum strain gauge load cell which is perfect for the use in dry areas. As a standard fitted with protection IP41, optionally available with IP65. As compared to other precision scale technologies the iL Precision 65F/SP impresses not only by its simple design but also by reaching its weighing accuracy w/o lever work or motorized calibration device.
Request for a quote
BURSTER PRÄZISIONSMESSTECHNIK GMBH & CO KG
Germany
The measuring element of the load cell consists of a double bending beam on which strain gages are applied. The applied force detunes the measuring bridge so that a proportional output voltage is generated. The strain gages on the measuring element are protected against dirt and water spray by a rubber bellows. The sensor can be easily mounted via two mounting holes. The tension or compression force to be measured is introduced at the opposite end perpendicular to the sensor axis. Due to its special design, the influence by an extension (e.g. touch finger) on the measuring signal is low. Overload protection can be realized with little effort using a mechanical stop. FEATURES For tension and compression forces Measuring ranges from 0 ... 5 N to 0 ... 2 kN Relative non-linearity: ≤ ±0.1 % F.S. Very low mounting height Simple force application Material aluminium or stainless steel Special design on request burster TEDS optionally available
Request for a quote
BURSTER PRÄZISIONSMESSTECHNIK GMBH & CO KG
Germany
The measuring element of this load cell consists of a double bending beam with strain gauges, the resistance of which changes with the application of force. Upon applying a voltage to the strain gauge bridge, the change in the strain gauge resistance is converted into output voltage, which is directly proportional to the force. The strain gauges and the entire measuring element are protected from water spray by metal cover including sealing material. The tensile or compressive load to be measured is applied to the sensor element through the M6 threaded hole located on each end face. The load can be applied easily, along the sensor axis. This serves to prevent falsification of the measured values. Overload protection can be realized with little effort using a mechanical stop. FEATURES Measuring ranges from 0 … 20 N to 0 … 880 N Relative non-linearity: ±0.25 % F.S. Many load cycles Protection class IP54 Excellent price-performance ratio burster TEDS optionally available
Request for a quote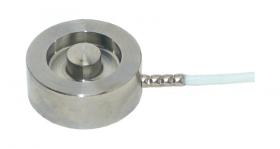
BURSTER PRÄZISIONSMESSTECHNIK GMBH & CO KG
Germany
Due to their small dimensions and sturdy construction, these miniature compression load cells made of stainless steel can be used in a wide range of industrial applications and in laboratories. This compression load cell is easy to handle and its installation is uncomplicated. Its small size makes it perfect for use in very restricted structures for both static and dynamic compression force measurements. The miniature compression load cell model 8415 is a flat cylindrical disc, the bottom of which is closed with a cover. The load application button for receiving the compression forces is an integrated part of the sensor. A strain gage full bridge is applied in the gauging member of the measuring element. This produces bridge output voltage directly proportional to the measured force. The small diameter of the sensors results in high rigidity and a short measurement range. The measuring force has to be applied centrically and free from lateral forces.
Request for a quote
BURSTER PRÄZISIONSMESSTECHNIK GMBH & CO KG
Germany
Due to their extremely compact design, these load cells can be used wherever static or dynamic load forces have to be measured in very tight spaces. Model 8416 is perfect for use in micro-technology and just as suitable for measuring tasks in the research and development sector. The ultra-miniature compression load cell model 8416 is a flat, circular disc, the bottom of which is sealed with a cover. The load application button for receiving the compression forces is an integrated part of the sensor. The sensor element inside the body carries a strain gage full bridge which outputs voltage directly proportional to the measurement variable upon application of force. The short nominal measurement distance of the ultra-miniature compression load cells due to their design provides a high degree of rigidity. If needed, the nominal characteristic value can be standardized in the sensor connection cable.
Request for a quote
BURSTER PRÄZISIONSMESSTECHNIK GMBH & CO KG
Germany
This miniature force sensor was optimised with respect to its height and is, at only 3.4 mm, the lowest known sensor with strain gage technology. Hardly higher than the diameter of its connection cable, it can also be housed in conditions where space is limited. Along with its minimal geometry, the force sensor is also particularly light. It has a high resonance frequency to follow quickly changing load alternations. Despite its extreme miniaturisation, in its application it remains completely robust and suitable for industry, not only with regard to the highly flexible cable connections or the full welding of sensors for the measurement ranges ≥ 0 … 10 N. The miniature compression force sensors are flat, cylindrical discs with covered bottoms. The central load application button for taking on compression forces is an integrated part of the top, which is the sensor‘s membrane.
Request for a quote
BURSTER PRÄZISIONSMESSTECHNIK GMBH & CO KG
Germany
This force measurement chain was developed for applications where a low cost solution is more important than achieving high levels of accuracy. The sensors strain gauge technology allows the measurement of static and dynamic forces. The load cell is also designed for applications that provide only little space due to its compact design. These properties, together with the sensors dust protection, make the measuring chain suitable for a wide range of applications, such as Industrial manufacture Manufacture of customized machinery Geological investigations Motor vehicle engineering Commercial agriculture Bridge building The body of the sensor is a flat, cylindrical disk, into which a domed force application knob is integrated. It is important that the force is applied axially to the center of the sensor. The domed form, however, minimizes the effect of a force that is not exactly axial.
Request for a quoteDo you sell or make similar products?
Sign up to europages and have your products listed

BURSTER PRÄZISIONSMESSTECHNIK GMBH & CO KG
Germany
The very short torque sensor model 8656 is contactless constructed. The torque is recorded by the torsion of the shaft using the strain gauge principle. Thanks to the inductive and optical transmission of the signals, the sensor is maintenance-free, the signals are digitized directly on the shaft and made available by the evaluation electronics as a voltage signal or via USB. Thanks to the high-quality, up to 10,000 rpm is possible. The direction of rotation can be seen from the potential of the output voltage, clockwise rotation corresponds to positive output voltage, counterclockwise rotation the voltage level is negative. The shaft is equipped with keyways in every measuring range, matching keys are included. If a key connection is not required, the key can be omitted. The torque is matched with suitable couplings, we recommend model 8690, safely transmitted.
Request for a quote
BURSTER PRÄZISIONSMESSTECHNIK GMBH & CO KG
Germany
The model 8527 high-precision compression load cell is the ideal load cell for reference measurement chains where highly precise measurement results are required. Its very high production quality and extremely low non-linearity of just 0.035 % F.S. make it a dependable choice for comparative measurements and calibration tasks. Designed for a dynamic stress of up to 100 % of the full scale value, the model 8527 load cell is also suitable for situations where a rapid signal change with high amplitude occurs and has to be measured. The model 8527 high-precision compression load cell has a domed load button on top, onto which the compressive load being measured is applied. Inside the load cell is an elastic membrane, on which strain gages generate a resistance change in the measuring bridge and an output signal proportional to the load. For the best possible measurement results, the force should be applied axially and centrically to the load button.
Request for a quote
BURSTER PRÄZISIONSMESSTECHNIK GMBH & CO KG
Germany
The force to be measured must be introduced axially and perpendicularly to the entire surface of the inner and outer bands of the sensor in the opposite direction. Conversion of the acting force into an electrical output signal is performed by strain gages connected together in a full bridge circuit. To achieve optimal accuracy, the base of the sensor should rest on a smooth level surface, hardened to at least ≥ 58 HRC with sufficient dimensions. The base cover welded to the surface has a stabilizing effect on the sensor element. Lateral forces must be avoided anyway as they distort the measured results. Tension and bending relief for the sensor cable is to be carried out on the machine side. FEATURES: — Measuring ranges from 0 ... 100 N to 0 ... 200 kN — Centric throughout hole — Flat disc design — Made of stainless steel — Completely welded sensor body — Nominal characteristic value standardization possible — burster TEDS optionally available
Request for a quote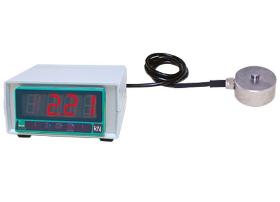
BURSTER PRÄZISIONSMESSTECHNIK GMBH & CO KG
Germany
The force measuring chain has been developed for applications where the requirements for precision are not the primary focus, but rather where an economical purchase price and simple functionality are the key criteria. The sensor‘s strain gauge technology allows both static and dynamically changing forces to be measured. The large display means that the force acting on the sensor can be read easily. The four integrated threaded holes allow the sensor to be integrated quickly and easily into existing production and assembly equipment. Typical applications include: —Testing the strength of welded joints —Sports medicine —Monitoring the clamping force of hose connections The body of the sensor is a flat, cylindrical disk, into which a domed force application knob is integrated. It is important that the force is applied axially to the center of the sensor.
Request for a quote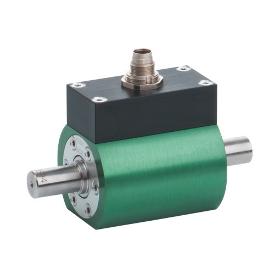
BURSTER PRÄZISIONSMESSTECHNIK GMBH & CO KG
Germany
This high precision torque sensor is designed for both static and dynamic measurements on non-rotating applications. It is particularly suitable for torque measurements on, for instance, extremely small electrical actuating drives and micro-mechanical actuator elements, or for measuring reaction torques e.g. on micro-motors. The high accuracy of measurement also makes this sensor ideal for use as a reference in many fields of industrial manufacture as well as laboratory research and development projects. Not containing any rotating parts, it requires no maintenance if properly used. The strain-gage based sensor’s modular design allows precise configuration for the desired application. With the integrated amplifier option, the sensor directly supplies a voltage signal of 0 ... ±10 V that is proportional to the torque. The sensor can be configured via the micro-USB interface, providing access to, for example, a filter frequency setting, averaging, and a tare function.
Request for a quote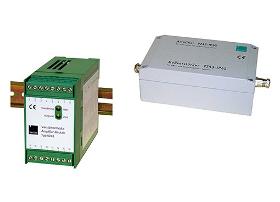
BURSTER PRÄZISIONSMESSTECHNIK GMBH & CO KG
Germany
The amplifier module model 9243 is used wherever measurement signals from strain gauges, potentiometric sensors or DC/DC sensors have to be converted into standard signals. Simply by mounting on conventional DIN-mount rails, it is possible to position the amplifier module on location, in the proximity of the sensor. Especially for rough environments a IP65 version is available. The broad auxiliary power range and the choice between AC or DC permits operation on standard power supplies used in switch gear cabinets. A highly precise reference voltage source is built-in for calibration purposes. A calibrating shunt can also be connected via two separate terminals. This permits deliberate detuning of a strain gauge sensor for calibration or merely to check the measuring chain.
Request for a quote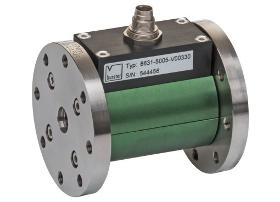
BURSTER PRÄZISIONSMESSTECHNIK GMBH & CO KG
Germany
This high-precision torque sensor is designed for both static and dynamic measurements on non-rotating parts. The 10mm diameter throughhole can be used to feed parts such as cables or Bowden cables through the sensor. The mounting flanges contain threaded holes and through-holes so that the sensor can be fitted at either end. With no rotating parts, this sensor needs no maintenance when used correctly. The modular design of this strain-gage sensor allows precise configuration for the desired application. With the integrated amplifier option, the sensor directly supplies a voltage signal of 0 ... ± 10 V that is proportional to the torque. The sensor can be configured via the micro-USB interface, providing access to, for example, a filter frequency setting, averaging, and a tare function. With the USB option, in addition to the voltage output, the measurement function is available via USB as well.
Request for a quote
BURSTER PRÄZISIONSMESSTECHNIK GMBH & CO KG
Germany
This high-precision torque sensor can be used to perform both static and dynamic measurements on non-rotating parts. The internal and external square drive design make this sensor especially easy to fit in existing or new screw-fitting applications. Quality assurance and monitoring of screw-fastening tools are just two applications that can take full advantage of sensor features such as USB port, built-in amplifier and side-load absorbing bearings. With no rotating parts, this sensor needs no maintenance when used correctly. Available accessories include mounting brackets and flange adapters, which enable quick, easy and practical integration of the sensor into existing or newly developed setups and test benches. The strain-gauge based sensor’s modular design allows precise configuration for the desired application. With the integrated amplifier option, the sensor directly supplies a voltage signal of 0 ... ± 10 V that is proportional to the torque.
Request for a quote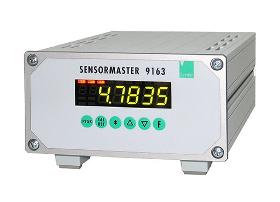
BURSTER PRÄZISIONSMESSTECHNIK GMBH & CO KG
Germany
The SENSORMASTER 9163 covers a wide range of applications in which process values need to be measured, displayed, analyzed and transferred to higher-level control systems. Typical applications include measuring geometric values in production, for instance differential measurements, or testing material properties in the laboratory. The measured values can be transferred via USB, RS232 or analog output. Features: — For force, pressure or torque measurements using strain gauge sensors — For position or angle measurement using potentiometric or DC/DC sensors — For temperature measurement using Pt 100 sensors or thermocouples — Optional multi-channel model — Optional Profibus or serial interface — 0.1 % measurement accuracy plus sensor-specific linearization — Range of mathematical functions (e.g. differential measurement) — OK/NOK feedback on multi color display and via 4 alarm limit outputs — High sampling rate (500/sec.)
Request for a quote
BURSTER PRÄZISIONSMESSTECHNIK GMBH & CO KG
Germany
Load cell model 8417 measures the tension or compression force between both axially mounted metric exterior threads on the cylindrical sensor housing. Forces are only applied to the threadings, which are especially long, to accommodate counter nuts and must not be affected by external influences such as bending, lateral force or torsion. Any contact with units affixed to the sensor housing - even on the front - must be avoided. The measurement element is a membrane perpendicular to the axis of the sensor with a strain gage full bridge applied to the inner surface, which requires stable excitation with a rated value of approx. 1 mV/V. The connection cable is led radially out of the housing through a sleeve which is used for strain relief. FEATURES: —Measuring ranges from 0 ... 10 N to 0 ... 5 kN —Very small dimensions —Made of stainless steel —Rugged construction —Simple screw mounting —burster TEDS optionally available
Request for a quote
BURSTER PRÄZISIONSMESSTECHNIK GMBH & CO KG
Germany
Inside the multi-component force transducer are two webs, each offset by 90°, each with a strain gage full bridge, which convert the radially acting X / Y forces on the guide bush into an electrical signal. Due to the sensor body made from a block with its special structure, the sensor has a very high degree of dimensional accuracy and low crosstalk between the two forces. Due to the special design, the sensor has excellent linearity properties and is designed for a long service life in dynamic applications. The two independent signal connections allow flexible adaptation and further processing. Features: — Measuring ranges: 0 ... 4448 N / 0 ... 2224 N (0 ... 1000 lbs / 0 ... 500 lbs); 0 ... 8896 N / 0 ... 4448 N (0 ... 2000 lbs / 0 ... 1000 lbs) — Further measuring ranges on request — Non-linearity < 0.1 % F.S. — Low cross talk < 0.75 % F.S. — High dimensional accuracy, because sensor is made from one part — Excellent price/performance ratio
Request for a quote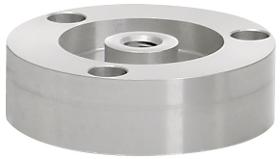
BURSTER PRÄZISIONSMESSTECHNIK GMBH & CO KG
Germany
The tension & compression load cells from the 8523 series are designed for a wide range of uses. The sensors feature many benefits, including three point-contact mounts for tilt-free installation. Thanks to this feature, excellent measurement results can be achieved even with a sub-optimum mounting surface. The force to be measured is applied to the central threaded hole in the tension or compression direction. For measuring purely compressive loads, using load buttons from our accessories range saves the need for complex sensor-integration mechanisms. Tensile loads in rods or chains can also be detected with ease using the optional pull plate. Inside the sensor is an elastic membrane, on which are applied strain gages connected in a full Wheatstone bridge. FEATURES Measuring ranges from 0 ... 20 N to 0 ... 5 kN Tilt-free installation thanks to point-contact mounts Excellent price/performance ratio Easy mounting burster TEDS optionally available
Request for a quoteResults for
Strain gages - Import exportNumber of results
38 ProductsCompany type