- europages
- >
- COMPANIES - SUPPLIERS - SERVICE PROVIDERS
- >
- measuring and testing systems
Results for
Measuring and testing systems - Import export
BIZERBA SE & CO. KG
Germany
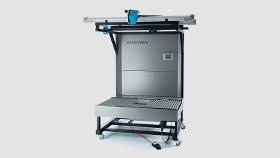
Specially designed for small and medium throughputs of up to 500 packages per hour, DWS static determines barcode, volume and weight in a single work step providing all relevant data for calculating freight and creating freight papers at the press of a button. With DWS static all shipping cost relevant data can be recorded at the touch of a button. The system comprises the tried and tested volume measuring system VMS 510/520, a robust static scale and a barcode scanner to read code information. All components are integrated in a sturdy mechanism. The system is ready for operation after a few minutes and is approved according to applicable standards. Also for full data recording in ERP systems verified systems are required.
Request for a quote
ERTEMES GMBH
Germany
Building an effective measuring and test equipment management system can be challenging, e.g. for companies in the early stages or in need to rebuild their system from scratch. However, good planning and implementation of the set-up are crucial to ensure that measuring and testing equipment works reliably and precisely and thus the quality of your products or services is assured. We support you in implementing an effective system right from the start. We work closely with you to understand your requirements and goals and then develop a bespoke concept tailored to your specific needs. Our experienced team supports you in the selection and procurement of suitable measuring and testing equipment and takes care of the complete documentation of the entire process. We ensure that your system complies with applicable standards and that your employees can use and maintain the system effectively. That ensures reliable and accurate measurements, thus helping to improve your product quality.
Request for a quote
GIGAHERTZ OPTIK GMBH
Germany
Measurement system for the testing of LEDs and LED assemblies. Features: CIE S025 compatible, temperature control, Keithley 2400 source, BTS2048-VL spectroradiometer, automatic measurement procedure, intuitive fast DUT contacting, etc.
Request for a quote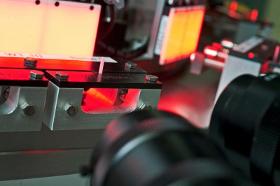
SIM AUTOMATION GMBH
Germany
- Quality control and safeguarding - Individual test values and criteria - Customer-specific measuring and testing plants - Single measuring systems with manual assembly - Fully integrated and automated testing plants using robots - Optical, acoustic or electrical systems with/ without parts contact, data preparation, analysis Measuring and testing systems we were involved in: - Camera systems with corresponding image processing - Part recognition, positioning, color and surface examination, checking for damages - Optical / tactile / ultrasonic tests using sensors and displacement measurement systems - Leakage and pressure tests - Inspection and monitoring of filling level - Run-out properties and accuracy - Backlash measurement - Electrical tests and measurements - Electrical values, check measurements, switching and opening properties Used in all branches: e.g. pharmaceuticals industry, medical engineering, cosmetics, electronics and automotive industries.
Request for a quote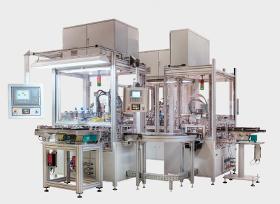
SIM AUTOMATION GMBH
Germany
The product portfolio at SIM Automation ranges from the effective design of individual manual workstations all the way through to completely interlinked, highly automated process lines. We handle all common transfer systems and can thus offer solutions that are independent from the branches of our customers. In addition to all standardized joining, measuring, testing and inspection systems, our assembly plants can also implement the customer’s own processes, including: - Joining, screwing, bonding, riveting, welding (laser, ultrasonic, resistance) - Testing, measuring, inspecting (optical, tactile, electrical, thermal) - Robot systems - Linear systems (pneumatic, electrical, mechanical) - Cam-controlled drives, linear and handling systems Testing and inspection lines we have been involved in: - Electric high-performance gear components (up to 6 kV) - Electric central locking systems (vehicles)
Request for a quote
MICRO-HYBRID ELECTRONIC GMBH
Germany
The NDIR bundle medical gases is a test set of perfectly matched components for gas analysis in the medical environment. The bundle offers a selection of IR emitters and detectors for the measurement of common gases such as CO2, CO, N2O, hydrocarbons, halothane, x fluranes or alcoholic compounds: three IR emitters of the JSIR 350 series in different housings and seven matched thermopile IR detectors with two or four channels of the MTS 200 series. Developers thereby achieve rapid results in the project phase: short-term availability of infrared components in small quantities; evaluation and testing of products and various components in one measuring system. Fast test results in the development of medical technology systems and devices help to achieve a significant competitive edge until the series product is ready for the market. Micro-Hybrid is the only manufacturer worldwide to supply both infrared components for gas analysis in one set.
Request for a quote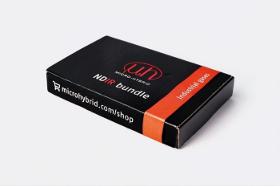
MICRO-HYBRID ELECTRONIC GMBH
Germany
The NDIR bundle industrial gases consists of optimally matched thin-film infrared emitters and various IR thermopile detectors for gas analysis in industrial applications. The set includes ten components for commonly measured gases such as CO2, CO, hydrocarbons, nitrogen compounds and alcohols: four JSIR 350 series IR emitters in various TO packages and six matched thermopile IR detectors with two or four channels of the MTS 200 series. In the development project, the NDIR bundle supports several goals: short-term delivery of IR components without minimum order, evaluation of components or testing of different components in the measurement system. Fast test results in development help to gain a decisive advantage on the way to market maturity of the series product. Micro-Hybrid is the only supplier worldwide to produce both IR components for gas analysis - practically and quickly available in one box.
Request for a quote
ERTEMES GMBH
Germany
HGL offers tailor-made PC solutions that have been specially developed to form a holistic measurement system in combination with HGL amplifiers. The PCs offer sufficient power reserves and storage capacity to operate several measuring devices in parallel on one computer and are compact in design. The compatibility with the existing measurement hardware was tested in numerous test series. Different form factors offer different ways to accommodate the computer hardware. In the 19" format, installation in measuring cabinets is no problem. Other form factors offer the option of mounting the PC directly to the back of a monitor. Network switches integrated into the PC hardware provide additional flexibility and clarity when setting up and operating complex measurement systems.
Request for a quote
ERTEMES GMBH
Germany
The ideal introduction to the world of vibration measurement. With four analog input channels, the Mosquito offers the ability to detect a triaxial vibration sensor and a speed signal. Alternatively, a modal hammer could also be operated for a measurement with subsequent modal analysis. •,4 analog input channels (from +/-10uV to +/- 100V) •,1 digital input channel (0-5V CMOS) •,1 analog output with signal generator (DC, 0-100kHz sine, sweep) •,Up to 100kHz bandwidth synchronously sampled across all channels •,16/24 bit resolution with 110+dB signal-to-noise ratio •,Compact dimensions (40 x 90 x 170 mm) •,Freely scalable! From one device with 4 analog channels to multiple devices with any number of channels •,1x Ethernet interfaces, connection for external 12V power supply, LVDS port for synchronization of multiple devices, USB port, IRIG input
Request for a quote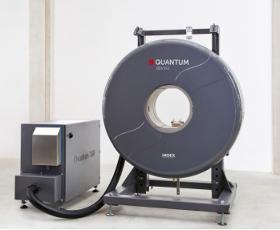
INOEX GMBH
Germany
The QUANTUM 360 has a terahertz sensor that reverses along the pipe to be measured. The coverage corresponds to a full 360° over the entire circumference of the pipe. This allows a very accurate overview of all process parameters. After selecting the pipe recipe, the QUANTUM 360 detects the pipe position, centers itself automatically to the pipe via a cross table and the sensor is automatically moved into focus. When changing dimensions, only a change of the pipe recipe is required. Due to the high measuring frequency, wall thickness, diameter and multi-layer measurements are possible with layer thicknesses from 100 μm. Other advantages/features: — Detailed product information (wall thickness, diameter, eccentricity, ovality) — Process automation through proven control principles — Non-contact measurement, no seals required — Material savings of up to 5% — Coextrusion measurement
Request for a quote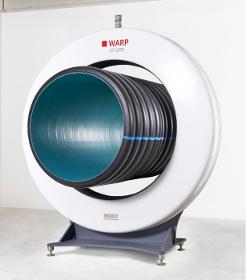
INOEX GMBH
Germany
The WARP CP is an inline measuring system with radar-based wall thickness sensors for detecting the various structures of a corrugated pipe. Outer and inner diameters, as well as the wall thicknesses of the bell, crest, liner, and valley can be resolved. The system is available for large, corrugated pipes with diameters from 300 mm. Since the corrugated tube has different structures, it is therefore necessary to assign the measurement data to the corresponding position on or in the tube. The WARP-CP algorithms do this automatically and prepare the data for the user in such a way that he receives different graphics and corresponding measurement data for each structure. Other advantages/features: — Non-destructive, contactless, and automated inline measurement of all relevant structures of the corrugated tube — No waste due to destructive measurement — Repair of critical thick and thin spots — Saving of material overweight in the end product
Request for a quote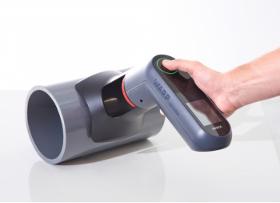
INOEX GMBH
Germany
The WARP portable is a mobile, radar-based hand-held gauge for selective wall thickness measurement, specially designed for medium and large pipe extrusion as well as for sheets. The application possibilities are very flexible, whether as a quick centering aid in the start-up process, for final production control or as a stock control device. Not only wall thicknesses at pipe ends can be measured, but also the progression inside a pipe section or a sheet. The measurement itself is performed at the push of a button. The last 500 measured values including the measuring angle on the pipe as well as the time stamp are stored. Over 400 WARP portable sold speak for themselves. Other advantages/features: — Hand-held measuring device for wall thicknesses from 2 to 110 mm (depending on material) — Measured value log including measuring position on the pipe (last 500 measured values) — Intuitive handling — Splash-proof housing (IP54)
Request for a quote
INOEX GMBH
Germany
The AUREX ERS uses the measuring technique of the Electronic Rotating Scanner (ERS) principle. With this active-passive measurement, every point of the measured object is detected 100% in longitudinal and circumferential direction, so that even minimal tolerance deviations are detected. Coextruded layers can also be detected as soon as they are physically detectable by ultrasound. The AUREX ERS is complemented by the optional "Quality Check", a wall thickness error check. The "Quality Check" detects anomalies on the surface, in the material and on the inner surface of the pipe. Further advantages/features: — 100 % wall thickness measurement for pipe dimensions up to 630 mm in diameter — Electronic rotation up to 16,000 rpm — Evaluation of vertical and angular signals reflected from the tube by activating adjacent sensors — Highest measuring resolution and identification of smallest production variations
Request for a quote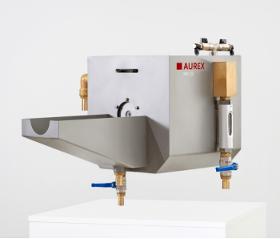
INOEX GMBH
Germany
The AUREX MK is the complete solution for pipe dimensions from 0.5 - 400 mm. It enables compliance with the specified tolerances for wall thickness, eccentricity, diameter and ovality. Thanks to the combination of high-quality electronics with innovative measuring methods, up to 7 layers from 0.02 mm wall thickness can be evaluated. In addition to the standard measurement for control and visualization of the product, the "Fast Specification Check MK/AFM" is optionally available, which allows a fast wall thickness check. Since the AUREX MK does not completely cover the pipe at the circumference, this wall thickness check can be used, for example, to detect typical thin section rings caused by jerking of the produced pipe at the entire circumference.
Request for a quote
INOEX GMBH
Germany
WARP 100 is an inline pipe measuring system for wall thickness and diameter measurement at up to 38 measuring points and 19 axes. More than 1100 measurements per second guarantee a gapless measurement. This is particularly important for pipes with high quality requirements, such as pressure or gas pipes. The maximum line speed for 100% coverage is up to 11.8 m/min. WARP 100 is available in three sizes and can be used for measurement in the diameter range from 25 to 630 mm. Measured variables such as wall thickness, diameter, ovality, eccentricity as well as process conditions (e.g. sagging) are precisely recorded, documented, and further used for automatic process control. Other advantages/features: — Measurement with 100% pipe coverage in diameter range from 25 to 630 mm (three sizes) — Wall thickness range from 2 up to 125 mm (depending on material) — Detection of thin sections within the tube — 100% documentation of production according to specifications
Request for a quote
INOEX GMBH
Germany
The WARP 8 is an inline pipe measuring system for wall thickness and diameter measurement at 8 points or 4 axes. It provides all important measurement data required for manual or automated process optimization and control. In addition to the short return-of-invest time, the system offers high measurement accuracy as well as process automation and documentation functions. The static sensors allow a high resolution of the measured values in the extrusion direction. Thus, process fluctuations are precisely recorded and visible, so that effects such as short-term fluctuations in output or backpressure effects during the sawing process can be detected and eliminated. Other advantages/features: — Diameter range from 60 to 1200 mm (five sizes) — Wall thickness range from 2 up to 250 mm (depending on material) — Short ROI period — Ideal for process optimization
Request for a quote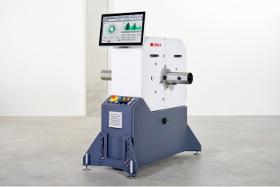
INOEX GMBH
Germany
The iXRAY solves almost all measuring, automation and documentation tasks for single and multi-layer pipes and hoses. Thanks to a precise spatial resolution and repeatabilities in the µm range, the system reliably generates exact measurement data. At high line speeds, the X-ray system - optionally two or three axes - delivers precise measurement results. The standard systems are available for pipe dimensions from 1 to 63 mm. The iXRAY series is user-friendly and the line operator only has to select the pipe, hose, or cable recipe to start the measurement. Other advantages/features: — Measurement of wall thickness distribution, inner and outer diameter, ovality and eccentricity — Up to 6 wall thickness values on the pipe or hose circumference — 3 diameter axes at 120° angle — High repeatability — High precision X-ray tubes with anode voltage up to 60 kV — Non-contact measurement, no seal, and no dimension-dependent accessories
Request for a quoteDo you sell or make similar products?
Sign up to europages and have your products listed
INOEX GMBH
Germany
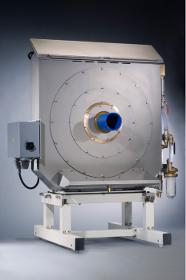
The AUREX AFM measuring chambers are flanged directly to the outlet of the vacuum tank. With up to 24 sensors a reliable and precise ultrasonic measurement with a centric pipe guidance is guaranteed. The measuring chambers are available for a diameter range of 63 - 630 mm. The AUREX AFM performs wall thickness and diameter measurement in parallel according to the number of sensors. Optionally, the AUREX AFM can be equipped with the "Fast Specification Check MK/AFM", which enables a fast wall thickness check. Since the AUREX AFM does not completely cover the tube at the circumference, this wall thickness check can, for example, detect typical thin section rings, which are caused by jerks of the produced tube at the entire circumference. Further advantages/features: — Large measuring range with measuring range extension — Parallel measurement of wall thickness and diameter — Very robust mechanics — Separable adapter for easier seal change
Request for a quote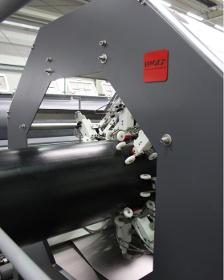
INOEX GMBH
Germany
The AUREX XXL is the solution for large pipes with a diameter of up to 3000 mm. The system works with 8 water-coupled ultrasonic sensors that can be pneumatically adjusted. This is possible without conversion in case of a change of dimensions. Minimum wall thickness tolerances are obtained via the downstream control loops of the weight per meter and thin point control and production is perfected. The better centering enables considerable material savings, especially for large pipes. Further advantages/features: — Production quality assurance by measuring and controlling wall thicknesses and diameter — Documentation of production — Material savings of up to 5% — Large measuring range — Proven measuring and control principles
Request for a quoteResults for
Measuring and testing systems - Import exportNumber of results
20 ProductsCountries
Company type